

Trending
Read All Articles +
Sound Trek | The Globe-Trotting Music Fans Transforming Economies One Stadium Show At A Time
You've heard about Swiftonomics, but it's not just Tay Tay driving the massive influx of gig-induced travel right now.

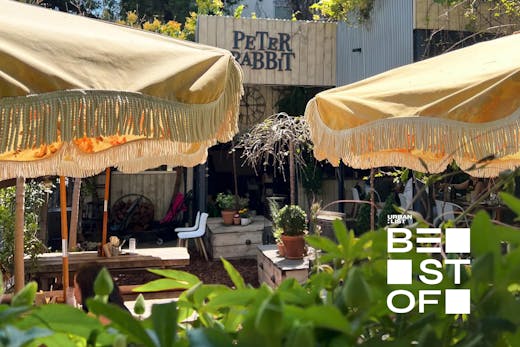
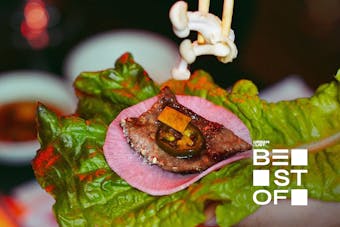
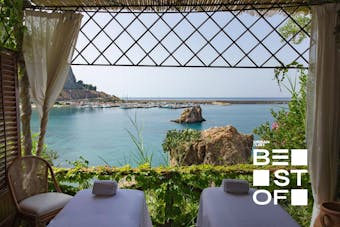
Heading To Dream Machine? Explore Our Editor-Approved Beach Clubs For Between Gigs
Nothing but sun, sand and sips all day long.
The Latest
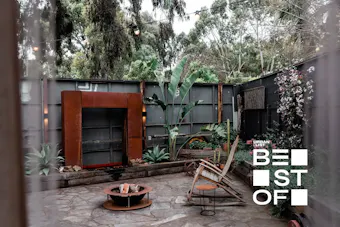
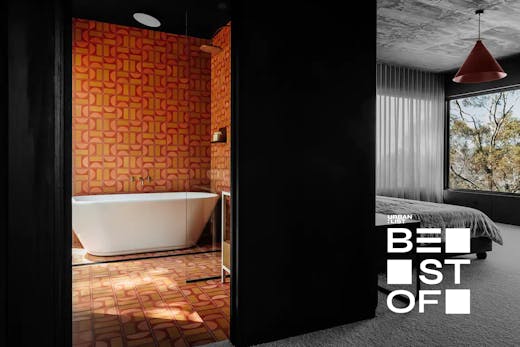
The Best Airbnbs In Adelaide And Beyond In 2024
Whether you're planning a romantic getaway, a family vacation, or a solo adventure, Adelaide knows a thing or two about secluded…


50 Of The Best Places To Visit In Australia In 2024
From breathtaking islands and sugar white sand beaches to sun-baked landscapes and jaw-dropping natural wonders, Australia is a land of…

This Jaw-Dropping Jewel Cave Is One Of Our Top Aussie Road Trip Stops For 2024
Whether you’re looking for an eventful vacation or a leisurely cruise along the shore, there’s a road trip across this…

Brisbane Bound? 7 Romantic Experiences To Enjoy With Your Squeeze On An Autumn Getaway
There are endless reasons to visit the sparkling shores of Brisbane—with so many amazing new bar and restaurant openings, to their…

New Mates And Milestones—Why You Need To Join New Balance And Kic’s Melbourne Run Club
Get familiar with KICRUN, an eight-week, uber inclusive run club from Kic founders, Laura Henshaw and Steph Claire Smith and the legends at…

25 Of The Best Things To Do In Bali In 2024
Where the Bintangs are cheap and the people are super friendly.

11 Best Hawker Centres In Singapore For Budget-Friendly Eats
When you’re hungry, these are the best hawker centres in Singapore. Just pack some napkins and cash, and Bob’s your uncle, lah.

From Megan Fox To Ariana Grande—Here’s How To Join Anime’s Growing Celeb Fan Base
From multi-million dollar Netflix remakes to collabs with some of our favourite brands, the world's biggest stars are jumping…

Qantas Flights To Japan: How To Buy Now And Pay Later
If you’re yet to experience the otherworldly journey to Japan, perhaps 2024 is the year that changes.

The Best Shows On Netflix Australia Right Now April 2024
The kind you could lose a whole weekend over.

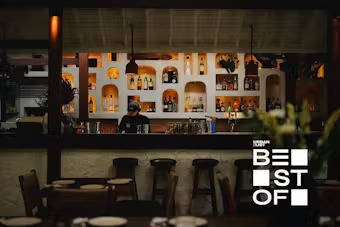
10 Of The Best Bars In Hobart To Visit In 2024
You’ll be in good hands when it comes to sipping on some of the world’s greatest spirits.

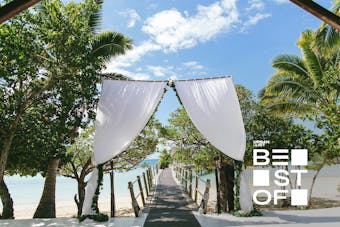
41 Of The Best Romantic Getaways Around Australia For That Mid-Year Escape
From jaw-dropping outback retreats to island escapes, get all swept up in each other’s irresistibleness at one of our top picks for…

What’s Behind This Subtropical City’s Epic Glow-Up?
When the New York Times names a city in their 2024 places to go, you pay attention—there’s something bold going down.

How To Book Your Next Holiday With Qantas And Pay Later In 2024
We all deserve to soar into the sunset as often as our jobs and lives allow, so this year, there’s a new plan of attack:…
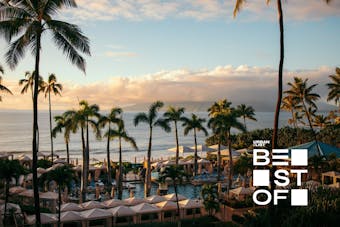
The Best Hawaii Resorts Actually Worth The Annual Leave (2024 Edition)
It's about time you kickback with a Mai Tai in hand.

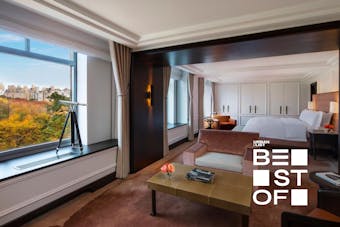
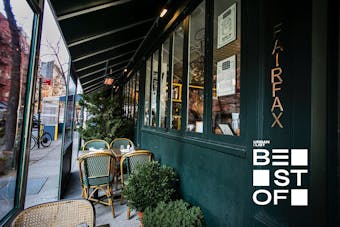
The Best Hotels In Los Angeles For Every Traveller In 2024
10 of the best hotels you can rest your head at in Tinseltown.

14 Of The Best Cookbooks Perfect For Gifting This Mother’s Day
So you'll never have to eat out again. Kind of.
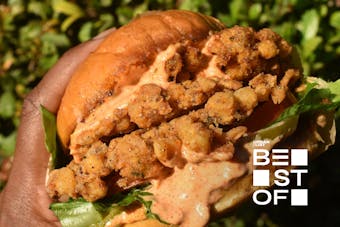
20 Fiji Restaurants You Need To Add To Your Bucket List
From fresh to fried for the gods. Whatever you're in the mood for, Fiji's got you.
Everywhere To Eat, Stay And Play In Canggu Bali In 2024
We’ve thrown together just some of our favourite places to see, eat, drink and stay around this luscious little town.
All Of The Best Restaurants In Bali According To Our Travel Editor In 2024
Those that have been to Bali enough will know that the foodie scene here has absolutely skyrocketed over the last few years.

The Best Bali Hotels To Book In 2024
If you’re keen for a getaway that absolutely throttles you in humidity so that pool dips every hour are a must and where hospitality…
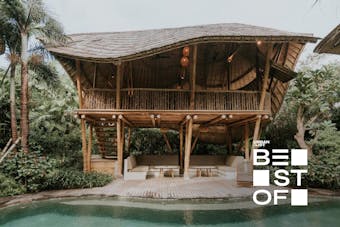
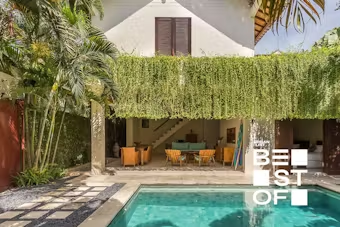
13 Of The Best Luxury Villas In Bali For A Tropical Stay In 2024
Whether you love staying close to the hustle and bustle, or want a slightly more tranquil setting to find some zen, we’ve compiled a…

10 Of The Best Cheap Airbnbs In London That Won’t Break The Bank In 2024
We’ve rounded up 10 of the best Airbnbs you can find in London for less than $200 a night. Sorted!

11 Of The Best Airbnbs In London In 2024
Writer’s lofts, charming townhouses, mezzanine apartments, luxury converted warehouses, bohemian hideaways and artist…

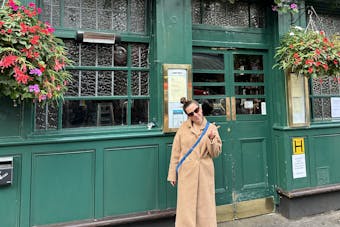
11 Of The Best London Restaurants You Need To Book A Table At In 2024
London is a veritable revolving door of imaginative restaurateurs with deep pockets.

NGV Unveils Mega Yayoi Kusama Retrospective Featuring Kaleidoscopic Infinity Room
Today, the NGV has unveiled plans to host a huge Yayoi Kusama retrospective featuring over 180 pieces of work, showcasing her entire…
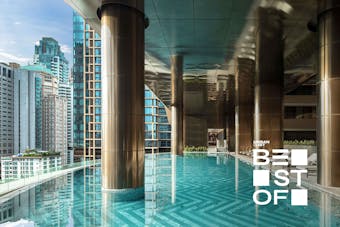
The Best Hotels In Bangkok For Your Next Thailand Adventure
At Urban List, we reckon the best hotels in Bangkok are all about sky-high luxury, Michelin-starred restaurants, and day spas that transport…

Singapore’s Best Rooftop Bars For Sky-High Sips
Whether you prefer A-list cocktails next to the world’s most famous infinity pool or understated Scandi-chic mixology, here's…

Relax Poolside By Day And Let Your Hair Down By Dusk At Bali’s Biggest Beach Club
The most efficient way to decide between a party-centric holiday and a relaxing getaway is to choose both, naturally.
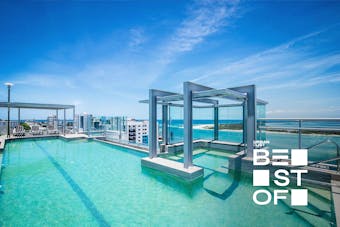
The Best Caloundra Accommodation For A Weekend Getaway
If you’re looking for something a little quieter than the hustle and bustle of Noosa, Caloundra is a loveable Sunshine Coast…

7 Of The Most Affordable Hotels In Los Angeles That Won’t Break The Budget In 2024
Make the most of your trip—and your travel budget—with these affordable hotels in Los Angeles.

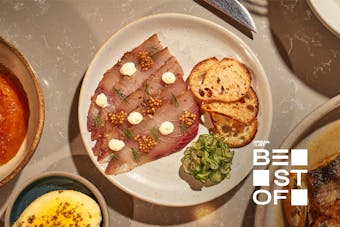
10 Of The Best Los Angeles Restaurants Worth The Trip
With so much to choose from and a limited amount of stomach space, it can be hard to weed through the tourist traps and find the real…
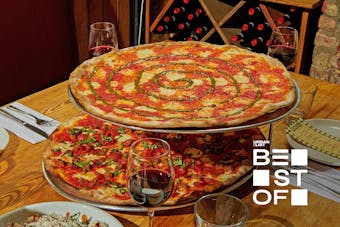
Grab A Slice At One Of The Best Pizza Joints in NYC In 2024
Aside from Italy, NYC is probably a close second when it comes to pizza. From classic New York style, Sicilian, to Neapolitan, the…
The Best Tokyo Day Trips To Take If You’re Up For A Real Adventure In 2024
Tokyo is a city that keeps you coming back for more with so much to do.
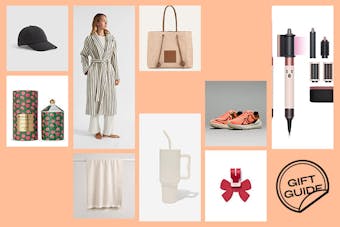
Mother’s Day Gifts: Thoughtful Gifts For Every Type Of Mum
Find the perfect Mother's Day gift for the most important woman in your life. Our hand-picked selection of unique and thoughtful gifts…

11 Of The Best Bali Cafes To Check Out In 2024
Kick off another day in paradise with a lazy brunch feast, or simply load up with an Aussie-quality oat long mach for that morning caffeine…
13 Of The Best Fiji Beaches You Need To See To Believe
Picture a holiday in Fiji and chances are you’ll end up daydreaming about a beach.
7 Of The Best Restaurants In Ktown Los Angeles (2024 Edition)
With its high concentration of bars, nightclubs and late night eateries, Koreatown is one of the most vibrant neighbourhoods in LA. And…
The Absolute Best Accommodation In Byron Bay In 2024
From luxury stays to budget escapes and everything in between, here is our guide to the best accommodation in Byron Bay.
The Best Cheap Hotels In Singapore Under $200 A Night
Planning a holiday in Singapore but struggling to make your bank account stretch for a night at Marina Bay Sands? These are the best…
All The Best Brooklyn Restaurants To Book A Table At Right Now
Head over the bridge for some of NYC's best fine diners and ground-breaking new openings this year.

10 Of The Best Steakhouses in NYC (2024 Edition)
Calling out meat lovers! If you’re in the mood for some high quality steaks, you’re guaranteed to find it in New York City.

14 Of The Best Airbnbs In Los Angeles
There’s so much more to the City of Angels than just Venice Beach and the Hollywood Walk of Fame.

Rooftop Sips And Italian Feasts: 5 Reasons To Book A Westin Perth Staycay
Whether you’re planning a chic retreat with your bestie or a swoon-worthy rendezvous with your someone special, The Westin…

17 Of Adelaide’s Best Hotels For Your Mid-Year Escape
While Sydney and Melbourne are often the go-to getaways for a cheeky weekender, Adelaide is one of Australia’s less-visited capital…

10 Of Tasmania’s Best Hotels For The Ultimate Mid-Year Getaway
We've done the hard work for you and uncovered the ultimate list of Tasmania’s best hotels. Book your next mini vacay and thank us…

20 Of The Best Things To Do In Tasmania In 2024
More than just the state of mouth-watering cheese and actual seasons, Tasmania is also home to more than a few incredible things to see,…

13 Of The Best Airbnbs In Tasmania For Your Next Getaway
Look, it’s a hard feat choosing the best Airbnbs in Tasmania. Kidding—we loved every minute of it.
18 Of The Best Hobart Restaurants To Hit Up In 2024
With its world-class arts, food and wine scene, Hobart is the beating cultural heart of Tasmania. So, if you're looking for…

The Best Hotels in Sicily Worth Splashing Your Cash On (2024 Edition)
From cosy B&Bs with priceless sea views to glamping in the Sicilian countryside.

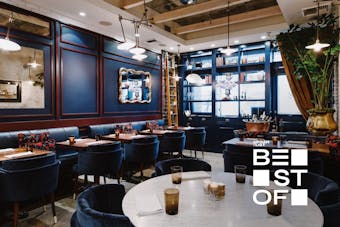
9 Unrivalled Brisbane Dining Experiences All Foodies Must Try
If your go-to food hit list is dwindling as you've eaten through your home city, Brisbane's pumping restaurant scene's…

The Best Beaches in Sicily To Sun Yourself With A Spritz
Italy’s biggest island is getting all the attention it deserves.

This Minimal Intervention Wine Brand Plants 1sqm Of Reforestation For Every Bottle Sold
With Earth Day right around the corner (FYI that’s 22 April), we all want to do our bit to help nourish the incredible land we call…

The Best Mattresses To Shop Now For A Perfect Sleep (2024 Update)
Elevate your sleep in 2024 with Urban List's curated list of the best mattresses to shop in Australia. From plush to firm, perfect for…
The Best Things To Do In Hobart In 2024
From breathtaking views to bustling festivals, Tassie’s capital city is perfect for a cheeky long weekend or to kick off a road trip…
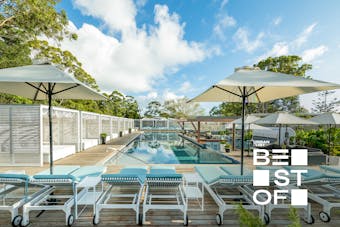
Heading To Dream Machine? Explore Our Editor-Approved Beach Clubs For Between Gigs
Time for a cheeky trip filled with sunshine, salty skin and some of the most divine clifftop and beachside bars.

The Best Things To Do In Sicily, According To A Local
From historic markets and island hopping, to saintly sweets and ruin exploration.

The Best Movies On Netflix Australia Right Now April 2024
Your up-to-date Netflix guide.

22 Of The Best Shows To Stream On Binge This Month 2024
Brought to you by the team at Foxtel so we can now all stream a heap of HBO Max, Warner Bros, Sony, NBCU, FX and BBC content.
The Best Airbnbs In Fiji For Your Next Island Getaway
From stunning honeymoon destinations to eco retreats, super swish villas and spots perfect for the whole family, Fiji’s Airbnb game is…

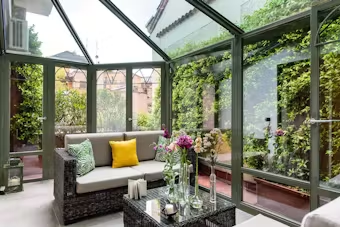
10 Of The Best Airbnbs In Paris To Book In 2024
Enjoy ultimate Parisian charm without compromising on comfort. These are the 10 best Airbnbs in Paris, according to Urban List.

10 Of The Best Hotels And Airbnbs In Paris With Eiffel Tower Views
From ultra luxe hotel vibes to cosy escapes in the heart of the city, be prepared to take in that postcard-perfect view from your own…
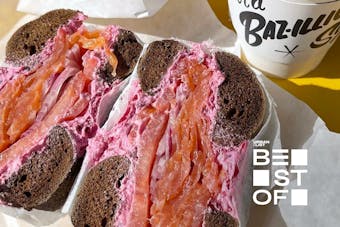
The Best Bagels In New York To Devour In 2024
Bagels are a classic Big Apple staple. While you can probably find a bagel on the menu of every corner deli, here are our top favourite…

From Onsen Dips To Ramen Hits—Here’s The Best Things To Do In Tokyo This Year
As the vibrant capital of Japan, Tokyo pulsates with an energy that is truly unparalleled.

Score Three Days Of Unlimited Gold Coast Theme Parks For Under $200
Escape to the Sunshine State this autumn and nab a Village Roadshow Escape Pass for three days of unlimited entry to Warner…

Access Four Thrilling Theme Parks For Only $179 With This Annual Locals Pass
Summer may have come to an end but there’s still plenty of fun, thrills and adventures to be had here in Australia’s…

11 Of The Best Airbnbs In Bali To Book A 2024 Trip Around
Grab yourself a Bintang and kick your feet up.

Get Moving In 2024 With This All-Encompassing Gym Membership
Eliminate barriers of resistance—and find a gym that hits all the right notes.

Cosy Up This Winter With Hommey’s Stunning New Organic Cotton Bedding
Get that fresh-out-of-the-dryer feeling.

The Best Things To Do In Fiji For Any Type Of Traveller In 2024
Life’s always better sipping a cocktail from a coconut while basking in the Fijian sun.

Met Gala Madness Is Near–Explore The Exhibit The Star-Studded Event Is Centred Around
New York City is coined “The City That Never Sleeps” for a reason.
Planning A Euro Summer? Make Sure This Cultural Melting Pot Makes The Cut
Everything you’ve heard is true: the pavements heave, the pubs swell, and the queues might just make you faint.

Escape The Chill And Catch The End Of Whale Season At This Tropical Oasis
So brush off your flower leis, pack the bathing suit and get excited for some of the best things to do in Hawaii.

10 Of The Best Tokyo Hotels For Your Next Japanese Adventure In 2024
Whether you're eyeing Ginza's stylish streets or Asakusa's old-world charm, a perfect Tokyo hotel is waiting for you.
10 Of The Best West Village Restaurants In New York (2024 Edition)
From Friends to Sex and City, West Village has been widely portrayed in famous movies and TV shows for its charming neighborhood…
Dive Into 12 Of The Best Seafood Restaurants In Singapore
Once a thriving fishing village, it should come as no surprise that Singapore’s seafood scene is second-to-none.
Check Out This Hidden Japanese Island Full Of Sparkling Beaches And Natural Wonders
Japan is far more than just packed city streets and temples.

A Guide To Onsen-Hopping In Japan’s Hot Springs Capital, Beppu
Laying back in steamy waters, blissfully allowing your muscles to relax and feeling the stress of the day unwinding is, for most Aussies, a…

The Best Barcelona Airbnbs To Check Into In 2024
Barcelona is the ultimate playground for the adventurous traveler, and finding the right Airbnb in this sun-soaked city sets the…
11 Of Milan’s Best Airbnbs For An Unforgettable Italian Sojourn
Milan is undoubtedly the fashion capital of Italy, where style and design are stitched into the city's very fabric. Milan, a…
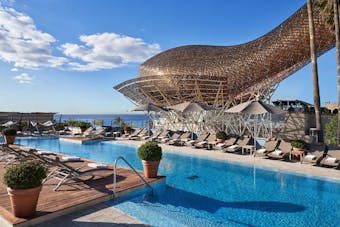
10 Incredible Barcelona Hotels To Add To Your Euro 2024 Bucket List
The Urban List team has rounded up 10 of Barcelona's best hotels for any type of traveller; from romantic couple's abodes to…


7 Of The Best Santa Monica Restaurants Right Now (2024 Edition)
Sundrenched and bordered by surf, it’s no surprise that Santa Monica has its fair share of tourist traps. But there’s culinary…

24 Of The Best Things To Do In Los Angeles In 2024
We always think you should take the advice of a local and bypass the tourist traps when it comes to exploring all the coolest things to…
The Best Restaurants In Beverly Hills To Add To Your Bucket List In 2024
From luxe tasting menus to swanky sushi spots, some things are worth blowing the budget for, especially when it means hanging around…
The Best Farmers Markets In LA To Hit Up In 2024
There’s a reason why people flock to the markets of Los Angeles every week.

New York’s Best Restaurants You Need To Book A Table At In 2024
Craving pasta? Burgers? Chinese? No matter what your cuisine preferences are, you’re guaranteed to find it there, which makes it the…

The Best Hotels In Mykonos For A Stunning Greek Islands Getaway
From luxury hotels to boutique stays and the chicest hostel we've ever seen, keep reading below for our list of the best hotels in…
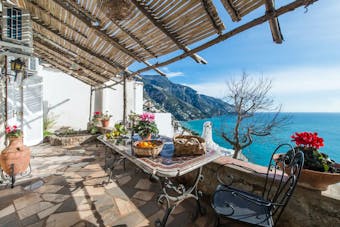
The Best Airbnbs On The Amalfi Coast For The Ultimate Dolce Vita In 2024
Bring your Dolce Vita dreams to life with our hit list of the best Airbnbs on the Amalfi Coast.
The Best Hair Straighteners And Multi-Stylers For Every Hair Type
If you’ve ever purchased a hair tool (or any product for that matter), you’re probably familiar with the fact that not all are…